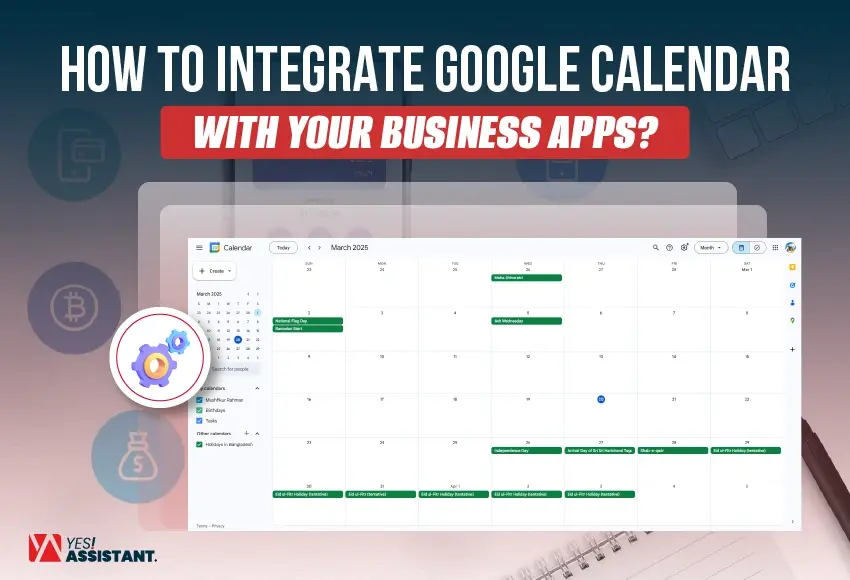
How to Integrate Google Calendar with Your Business Apps?
You can easily integrate the Google Calendar with your business apps. Google is one of the simplest and most featureful platforms that offers various facilities for syncing with other tools for better automation workflow management.
In this blog, we are going to discuss the most useful integration methods of Google Calendars, such as –
- API integration with Google Calendar API.
- Calendar syncs in iCal format through URL.
- Calendar API authentication through the Google API Console.
Also, we will show you the complete integration process with the help of Zapier(integration platform for automated workflows), from creating new calendar events, deleting events, event cancelation, finding and updating events, API requests, etc.
What's Inside
Methods of Integrating Google Calendar with Business Apps
There are different ways(API, calendar sync, G Suite syncs, and third-party integration) to flawlessly integrate the Google Calendar with business apps. In this section, we will discuss the most often-used integration of this calendar platform.
- Google Calendar API – The Google Calendar API tool is fully optimized by their expert team of developers. This RESTful API obtains access through explicit HTTP calls and creates connectivity with all the features of Calendar, such as customizing event information and editing calendar metadata and time zones.
- Calendar Syncs – Google Calendar also has features for syncing calendars. It’s one of the most efficient processes, as you intend to integrate it with the business apps. You can publicly sync it in iCal format through a URL. By following this process, you can easily integrate with the Microsoft Outlook calendar.
- Use OAuth 2.0 – This is the authentication and authorization process for accessing the calendar API. It will help you connect the API in multiple places, such as client-side, web servers, and installed applications. You have to provide the client or application credentials to the Google API Console, and you will get a token after authorization. Then, you have to use this token for your preferred business app.
- Integration with the Google Workspace – Google has calendar integration functionality with Google Workspace. It’s beneficial for the developers. From the Google developer account, they can easily integrate the calendar with the API access.
Also, there are apps available for the integration process, such as Asana, Stride Calendar, Zoho Projects, and Zapier. In this blog, we will show you the integration process using Zapier.
Integrating Process of Google Calendar Using Zapier
In Google Calendar, you can easily integrate a business app like Zapier. Zapier is one of the most prominent and valuable online web automation tools. This tool helps users automate their workflows, such as social media tasks, email management, project management, calendar management, appointment scheduling, and more administrative tasks.
Some of the focused features of Zapiers are – trigger automation, webhooks, real-time team collaboration, etc. So integrating the Google Calendar with Zapier is highly effective for your overall task management process.
In this section, we are going to show you the complete integration process of Google Calendar with Zapier.
- First, visit your Zapier account. Now, navigate to the right section of the interface and tap on the Zaps
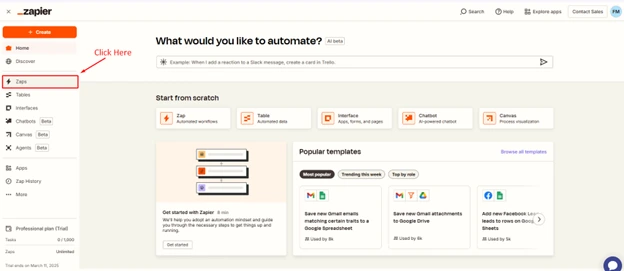
- This will take you to the Zap automated workflow
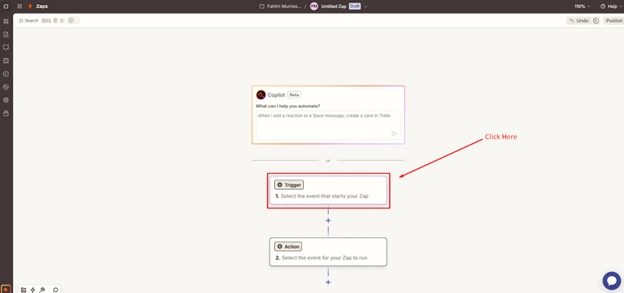
- As you can see, this is the automation trigger interface for integration. From this section, click on the Trigger
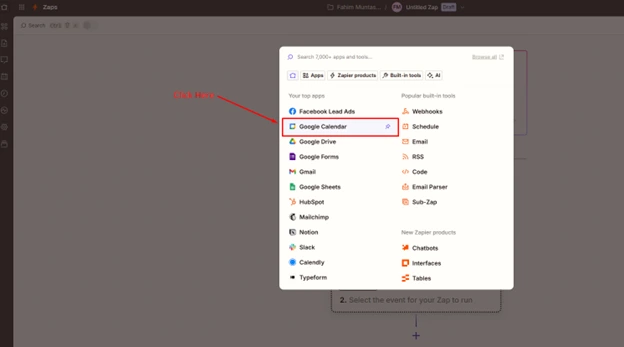
- In the trigger option, you can see all the apps that can be integrated with Zapier. We will integrate the Google Calendar, so select the app from here.
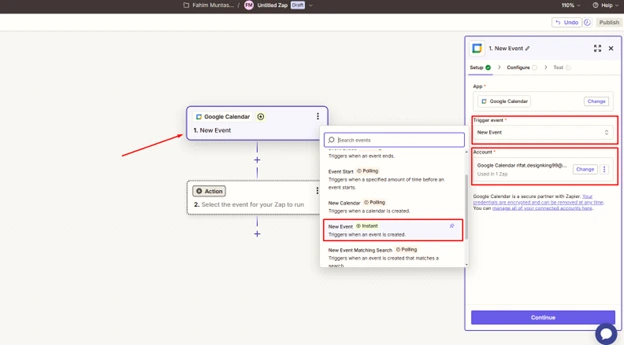
- We have added the Google Calendar app to the process. Navigate to the right section of the page. You will see the calendar customization menu, which includes trigger events and accounts. In the trigger event, you can add multiple types of activities such as – event cancellation, event ended, event start, new calendar, new event, etc.
- Here, we have selected the New Event for the triggering process.
- Another important thing is to connect the Google Account with this integration process.
- After properly filling out all these sections, click on the Continue
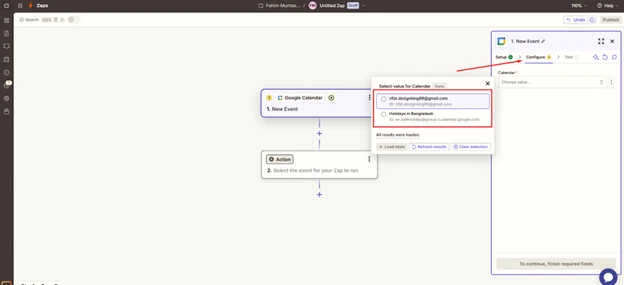
- Clicking on the Calendar value will show your Google account calendar value. Currently, we have two different values here. So, choose the value carefully based on your purpose. Click on the continue button to test this trigger.
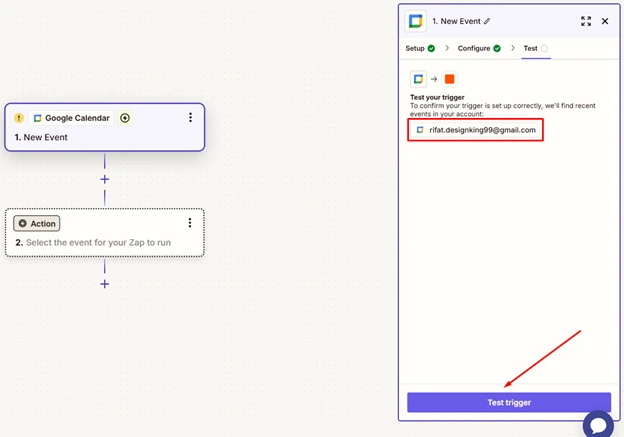
- Click on the test trigger button to test this Google Calendar.
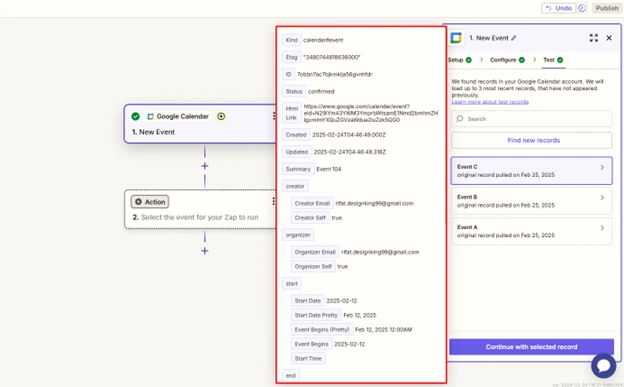
- Here, you can see all the records about the events. It will show you all the info about the created event, such as ID, status, created date, summary, creator email, start date, etc. After checking up on Continue with the event, tap the Continue with the selected record
Along with the trigger event, you can also create actions for the events with the help of Zapier. We are going to show you the process.
- Tap to the Action menu below the Trigger From here, again, choose the Google Calendar.
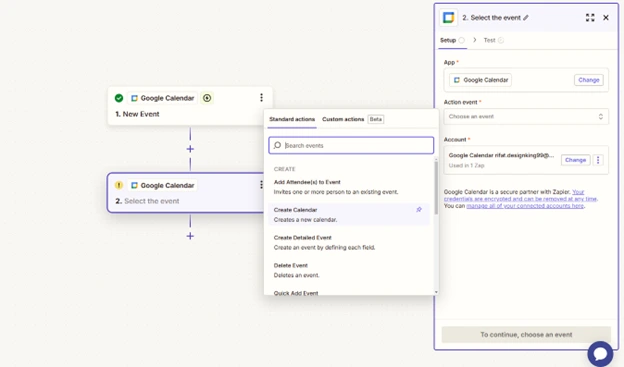
- As you can see, the action menu shows all the actions that are applicable to the Google Calendar event. Such as creating the calendar, deleting events, updating events, API Requests, finding events, quickly adding events, finding multiple events, etc. You can choose any of the actions here. Along with that, there are options for creating the custom action. After selecting the action, tap on the continue button.
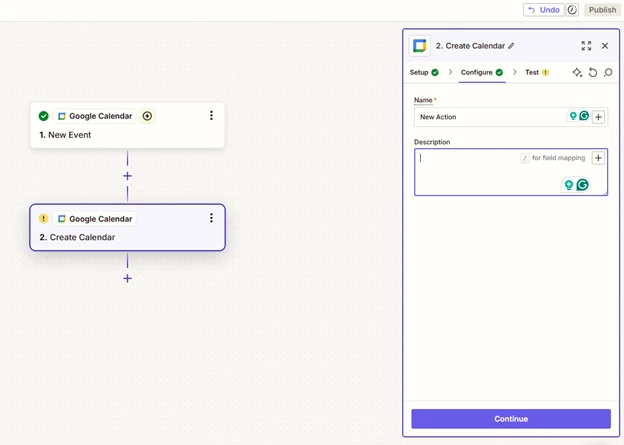
- The following section sets up the event configuration. For this specific event, you have to provide a specific name based on your preference. Also, you have to fill out the description for this specific action. Click on the continue button.
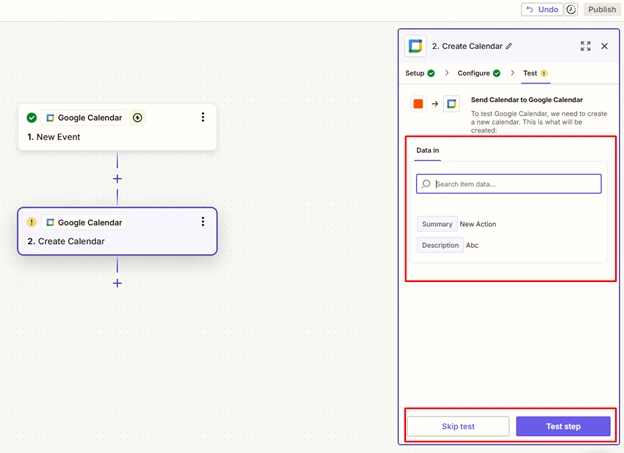
- This is the test interface of the Google Calendar action. Now, if you want, you can skip the test or test it for further processing. We will test the action, so click on the Test step button from the right bottom section.
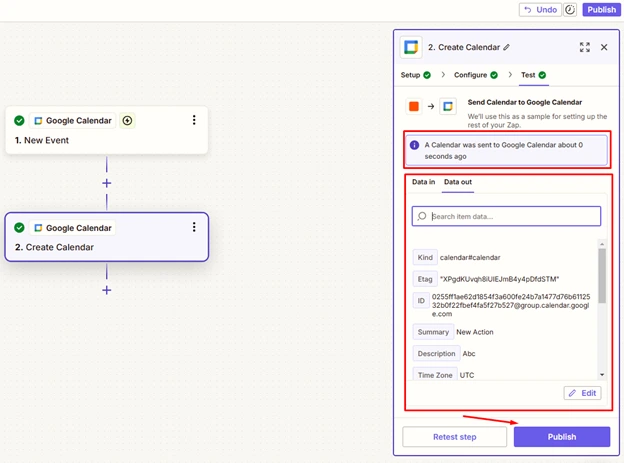
- We have created the action for adding a new calendar to our Google Calendar. So it’s showing the alert “A Calendar was sent to the Google Calendar about 0 seconds ago”.
- Along with that, it shows the data about the action, such as ID, summary, description, time zone, etc. It’s time to publish the action. After verifying the data, click on the Publish button from the bottom right corner of the section. There is an option called the Retest step. If you think that the action data are incorrect, then you can easily retest each step.
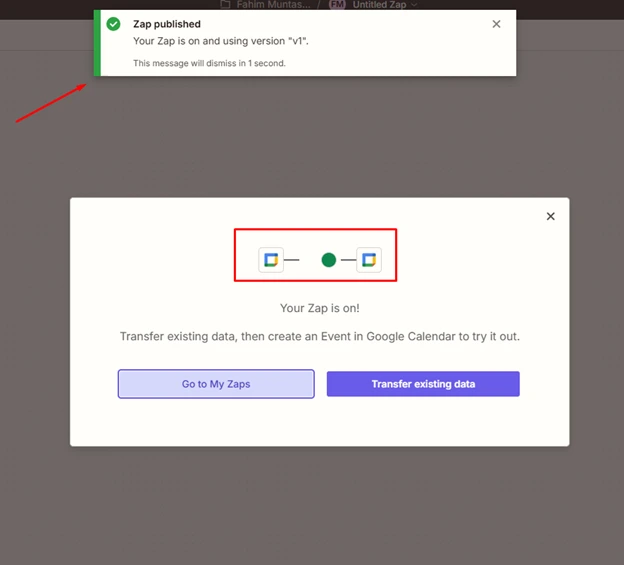
Finally, our Zap is ready. We have created this Google calendar integration with triggers and actions. Now, you can transfer this existing data and create an event in Google Calendar easily.
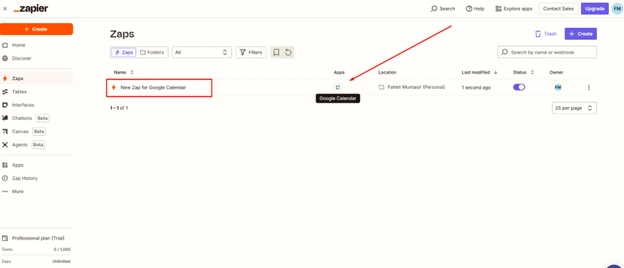
Well, our Google calendar integration is listed on Zaps. Here, you will be able to see all the information about each Zap, such as integrated apps, location, last modified time, current status, and owner. Also, you can delete the unnecessary Zaps here.
Final Words
For proper workflow management, Google Calendar is the most essential platform. You can set up multiple events, appointments, reminders, tasks, etc., on this single platform for your business. That is why we have assisted you throughout this blog with the integration process of Google Calendar with the business app Zapier.
This integration process involves creating triggers and actions for the calendar. We have also discussed multiple methods of Google Calendar integration, such as API, calendar sync through URL, and Google Workspace integration. So, whether you’re new to automation or looking for calendar management support, you can easily automate your workflows and manage tasks efficiently.